
Testing the UI without UI Testing in Swift
Over the years of testing applications I’ve started to put more and more value in end-to-end integration tests. They help me identify new categories of bugs that are harder to catch when only doing unit tests.
Don’t get me wrong, unit tests are invaluable when working in the weeds or deep in the stack. And I would never integration test an HTTP client. But more recently I’ve been bitten by the “2 unit tests 0 integration tests” meme.

Normally I’ve reached for UI Testing. Unfortunately, more and more issues with XCUITest seem to pop up. It’s become (always has been?) a tad too flaky and unreliable. And even when it works it’s orders of magnitude slower than XCTest.
Whats been working for me is a middle ground: testing the UI in XCTest. In other words, integration- or feature-level tests written in Xcode’s unit testing framework.
Unit vs. integration vs. feature tests #
Before going deeper, let’s make sure we are using the same terms. Here’s how I differentiate the three different types of tests.
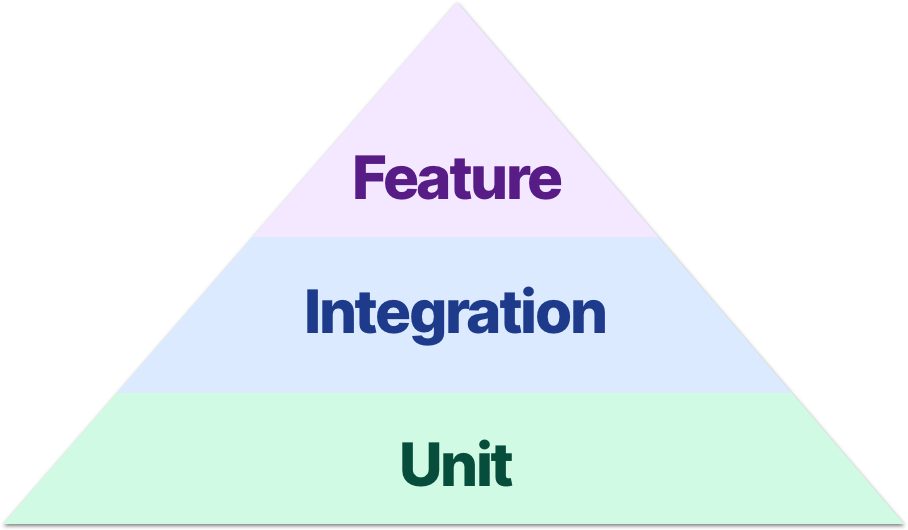
Unit tests #
The lowest level of testing and the one folks are most familiar with. These test a single “unit” - usually a struct or class. Ideally, all collaborators are mocked or stubbed out to return specific values.
A common example is testing a HTTP client. When you call a specific function, with specific parameters, the URLSession receives a specific function call. The session is stubbed out and you only verify the right messages and data were passed along.
Integration tests #
One level up we have integration tests. I like to think of these as “friendly” unit tests - they get a few different units in the same room and let them mingle.
Integration tests start somewhere in the middle of the stack and stub out as little as possible. For example, testing when a specific function is called on a controller the table view adds a row. We might stub out a network connection, but the interaction with our model is left unaltered.
Feature tests #
The big boys. Usually reserved for UI Testing, they test the entire stack of the application. Think tapping a button or pull-to-refresh. They start with a human interaction and end with verifying something the person can see on the screen.
With the exception of network connections, third-party code, or seeded data, these tests will rarely stub or mock anything.
Feature tests without UI Testing #
The remainder of this post will focus on feature-level testing.
Here are a few common interactions that are normally reserved for UI Testing. While not impossible with XCTest, there are a few hoops we have to jump through.
Test tapping a button #
Let’s start small: tapping a button unhides a text label. Here’s the controller we will be testing. The storyboard wires up an event to trigger the showText() action when tapped.
class HomeViewController: UIViewController {
    @IBOutlet weak var toggleTextButton: UIButton!
    @IBOutlet weak var textLabel: UILabel!

    @IBAction func showText() {
      textLabel.isHidden = !textLabel.isHidden
    }
}
A skeleton test might look like this.
func testTappingAButton() throws {
    let storyboard = UIStoryboard(name: "Main", bundle: nil)
    let controller = storyboard.instantiateViewController(identifier: "Home")
        as! HomeViewController

    // tap the button?

    XCTAssertFalse(controller.textLabel.isHidden)
}
But what replaces the comment? There’s no .tap() function on UIButtons, so how do we trigger the action?
Turns out we can simulate the effects of this by sending the event. In our case, “touch up inside”.
controller.toggleTextButton.sendActions(for: .touchUpInside)
However, the button will still be nil. We can solve this by telling the framework load the view, only if needed. This is one of my favorite little secret methods for testing!
controller.loadViewIfNeeded()
Our completed, passing test looks like this. I’ve also broken down the test into three sections: given, when, and then.
func testTappingAButton() throws {
    let storyboard = UIStoryboard(name: "Main", bundle: nil)
    let controller = storyboard.instantiateViewController(identifier: "Home")
        as! HomeViewController
    controller.loadViewIfNeeded()

    controller.toggleTextButton.sendActions(for: .touchUpInside)

    XCTAssertFalse(controller.textLabel.isHidden)
}
Test pushing a view controller #
Up next is testing the push of a new view controller on a UINavigationController. As before, here’s a first pass at a test using our “tap” knowledge from before.
func testPushingAViewController() throws {
    let storyboard = UIStoryboard(name: "Main", bundle: nil)
    let navigationController = storyboard.instantiateInitialViewController()
        as? UINavigationController
    let homeViewController = navigationController?.topViewController
        as! HomeViewController
    homeViewController.loadViewIfNeeded()

    homeViewController.pushDetailButton.sendActions(for: .touchUpInside)

    XCTAssertEqual(navigationController?.viewControllers.count, 2)
    XCTAssert(navigationController?.topViewController is DetailViewController)
}
Unfortunately, both of our assertions fail. However, unchecking “Animates” in the segue (or push(controller, animated: false)) gets them passing again. What’s going on?
The animation is happening outside the scope of the tests. Essentially, it’s asynchronous. While you might be tempted to reach for asynchronous expectations, there’s a better option.
RunLoop.current.run(until: Date()), or as we called it at Pivotal Labs, “ticking the run loop.”
This delays the test suite the slightest bit, just enough to catch up with the asynchronous behavior of the animation.
Our completed, passing test now looks like this:
func testPushingAViewController() throws {
    let storyboard = UIStoryboard(name: "Main", bundle: nil)
    let navigationController = storyboard.instantiateInitialViewController()
        as? UINavigationController
    let homeViewController = navigationController?.topViewController
        as! HomeViewController
    homeViewController.loadViewIfNeeded()

    homeViewController.pushDetailButton.sendActions(for: .touchUpInside)
    RunLoop.current.run(until: Date())

    XCTAssertEqual(navigationController?.viewControllers.count, 2)
    XCTAssert(navigationController?.topViewController is DetailViewController)
}
Test presenting a modal view controller #
What’s so different about presenting vs. pushing? Under the hood, apparently a lot.
Again, here’s a first pass at a test, building on the previous two examples.
func testPresentingAModalViewController() throws {
    let storyboard = UIStoryboard(name: "Main", bundle: nil)
    let navigationController = storyboard.instantiateInitialViewController()
        as? UINavigationController
    let homeViewController = navigationController?.topViewController
        as! HomeViewController
    homeViewController.loadViewIfNeeded()

    homeViewController.presentModalButton.sendActions(for: .touchUpInside)
    RunLoop.current.run(until: Date())

    let presentedViewController = navigationController?.presentedViewController
    XCTAssertNotNil(presentedViewController)
    XCTAssert(presentedViewController is ModalViewController)
}
You probably guessed it by now, but those assertions both fail. And turning off the animation of the modal presentation doesn’t seem to help.
If loading the view and ticking the run loop don’t work we need to go a bit deeper. Something that more closely mimics how a real application works. Enter UIWindow.
let window = UIWindow()
window.rootViewController = navigationController
window.makeKeyAndVisible()
This code might look familiar, it reminds me of what we used to do in UIApplicationDelegate before storyboards came around. In our test suite we are using it to the same gain - getting the controller inside of a real window.
Once inside a window a lot of magic happens. (I’m not going to pretend I understand it all.) But what matters for us is combining all three approaches gets our modal presentation working.
func testPresentingAModalViewController() throws {
    // load the controllers
    let storyboard = UIStoryboard(name: "Main", bundle: nil)
    let navigationController = storyboard.instantiateInitialViewController()
        as? UINavigationController
    let homeViewController = navigationController? .topViewController
        as! HomeViewController

    // attach them to a real window
    let window = UIWindow()
    window.rootViewController = navigationController
    window.makeKeyAndVisible()
    homeViewController.loadViewIfNeeded()

    // tap the button and tick the run loop
    homeViewController.presentModalButton.sendActions(for: .touchUpInside)
    RunLoop.current.run(until: Date())

    // run the assertions
    let presentedViewController = navigationController?.presentedViewController
    XCTAssertNotNil(presentedViewController)
    XCTAssert(presentedViewController is ModalViewController)
}
Refactoring the tests #
Before we move on let’s address how verbose these tests have grown. Our third test has over 10 function calls - we can do better!
Here are some helpers I’ve extracted to reuse across the test suite.
extension XCTestCase {
    func loadInitialViewController(in: UIWindow? = nil) -> UIViewController? {
        let storyboard = UIStoryboard(name: "Main", bundle: nil)
        let navigationController = storyboard.instantiateInitialViewController()
            as? UINavigationController
        let topViewController = navigationController?.topViewController

        if let window = in {
            window.rootViewController = navigationController
            window.makeKeyAndVisible()
        }

        topViewController?.loadViewIfNeeded()
        return topViewController
    }
}

extension UIButton {
    func tap() {
        sendActions(for: .touchUpInside)
        RunLoop.current.run(until: Date())
    }
}
Using these, our actual tests are much easier to read. And we’ve set ourselves up to use these in future tests or projects!
func testTappingAButton() throws {
    let controller = loadInitialViewController() as! HomeViewController
    controller.toggleTextButton.tap()
    XCTAssertFalse(controller.textLabel.isHidden)
}

func testPushingAViewController() throws {
    let controller = loadInitialViewController() as! HomeViewController

    controller.pushDetailButton.tap()

    let navigationController = controller.navigationController
    XCTAssertEqual(navigationController?.viewControllers.count, 2)
    XCTAssert(navigationController?.topViewController is DetailViewController)
}

func testPresentingAModalViewController() throws {
    let window = UIWindow()
    let controller = loadInitialViewController(in: window) as! HomeViewController

    controller.presentModalButton.tap()

    let presentedViewController = controller
        .navigationController?.presentedViewController
    XCTAssertNotNil(presentedViewController)
    XCTAssert(presentedViewController is ModalViewController)
}
Three new approaches to XCTest #
We learned three different techniques for how to test the UI without UI Testing.
- Send the action to a button to simulate a tap
- Tick the run loop to “wait” for pushing a controller
- Use a real
UIWindowto simulate the real app
Teach a dev to fish #
I challenge you the next time you reach for XCUITest to take a step back. Ask yourself, do I need this framework? Or can I get by with “just” XCTest and some UIKit manipulation? Can I use one of these new ideas to test what I’m working on?
This is the approach I’ve started to take more often recently and I’ve really been enjoying it. I still have some UI Tests but they are starting to dwindle. And my test suite has never been faster or more reliable.
How are you testing your UI? #
Have you had a better experience with UI Testing? Or adopted something similar to this? I’d love to hear what you think! Feel free to discuss on GitHub or reach out on Twitter.