
Swift for Ruby developers crash course
On Thursday I hosted a 40-minute crash course on Swift + iOS. The session was aimed at Ruby + Rails developers who want to build Turbo Native apps but lack knowledge of Swift and iOS.
I covered the fundamentals of Swift and iOS, and compared and contrasted each concept to Ruby and Rails, making it easier for web developers to understand.
If you missed the live stream you can watch the recording on YouTube. Read on for a breakdown of the Swift topics with copy-pasteable code snippets.
Get my weekly Hotwire Native newsletter
Join 3,700+ Rails developers building iOS and Android apps with Hotwire Native. Includes exclusive content and first access to upcoming products.
Getting started with Swift #
To get started, you will need Xcode installed. You can download the latest version from Apple’s Developer site for free.
To demonstrate Swift we will use a Playground. Its kind of like being able to edit and run a Ruby file without leaving your editor.
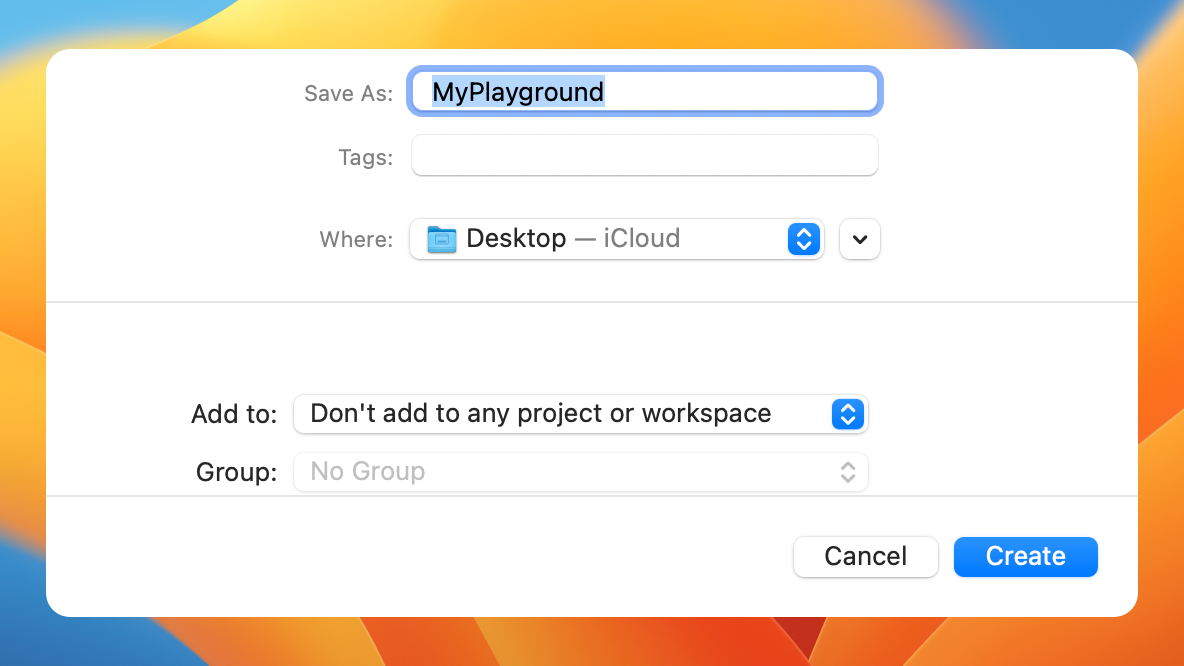
To create a new playground, open Xcode and click File → New → Playground. Then select Blank and click Next.
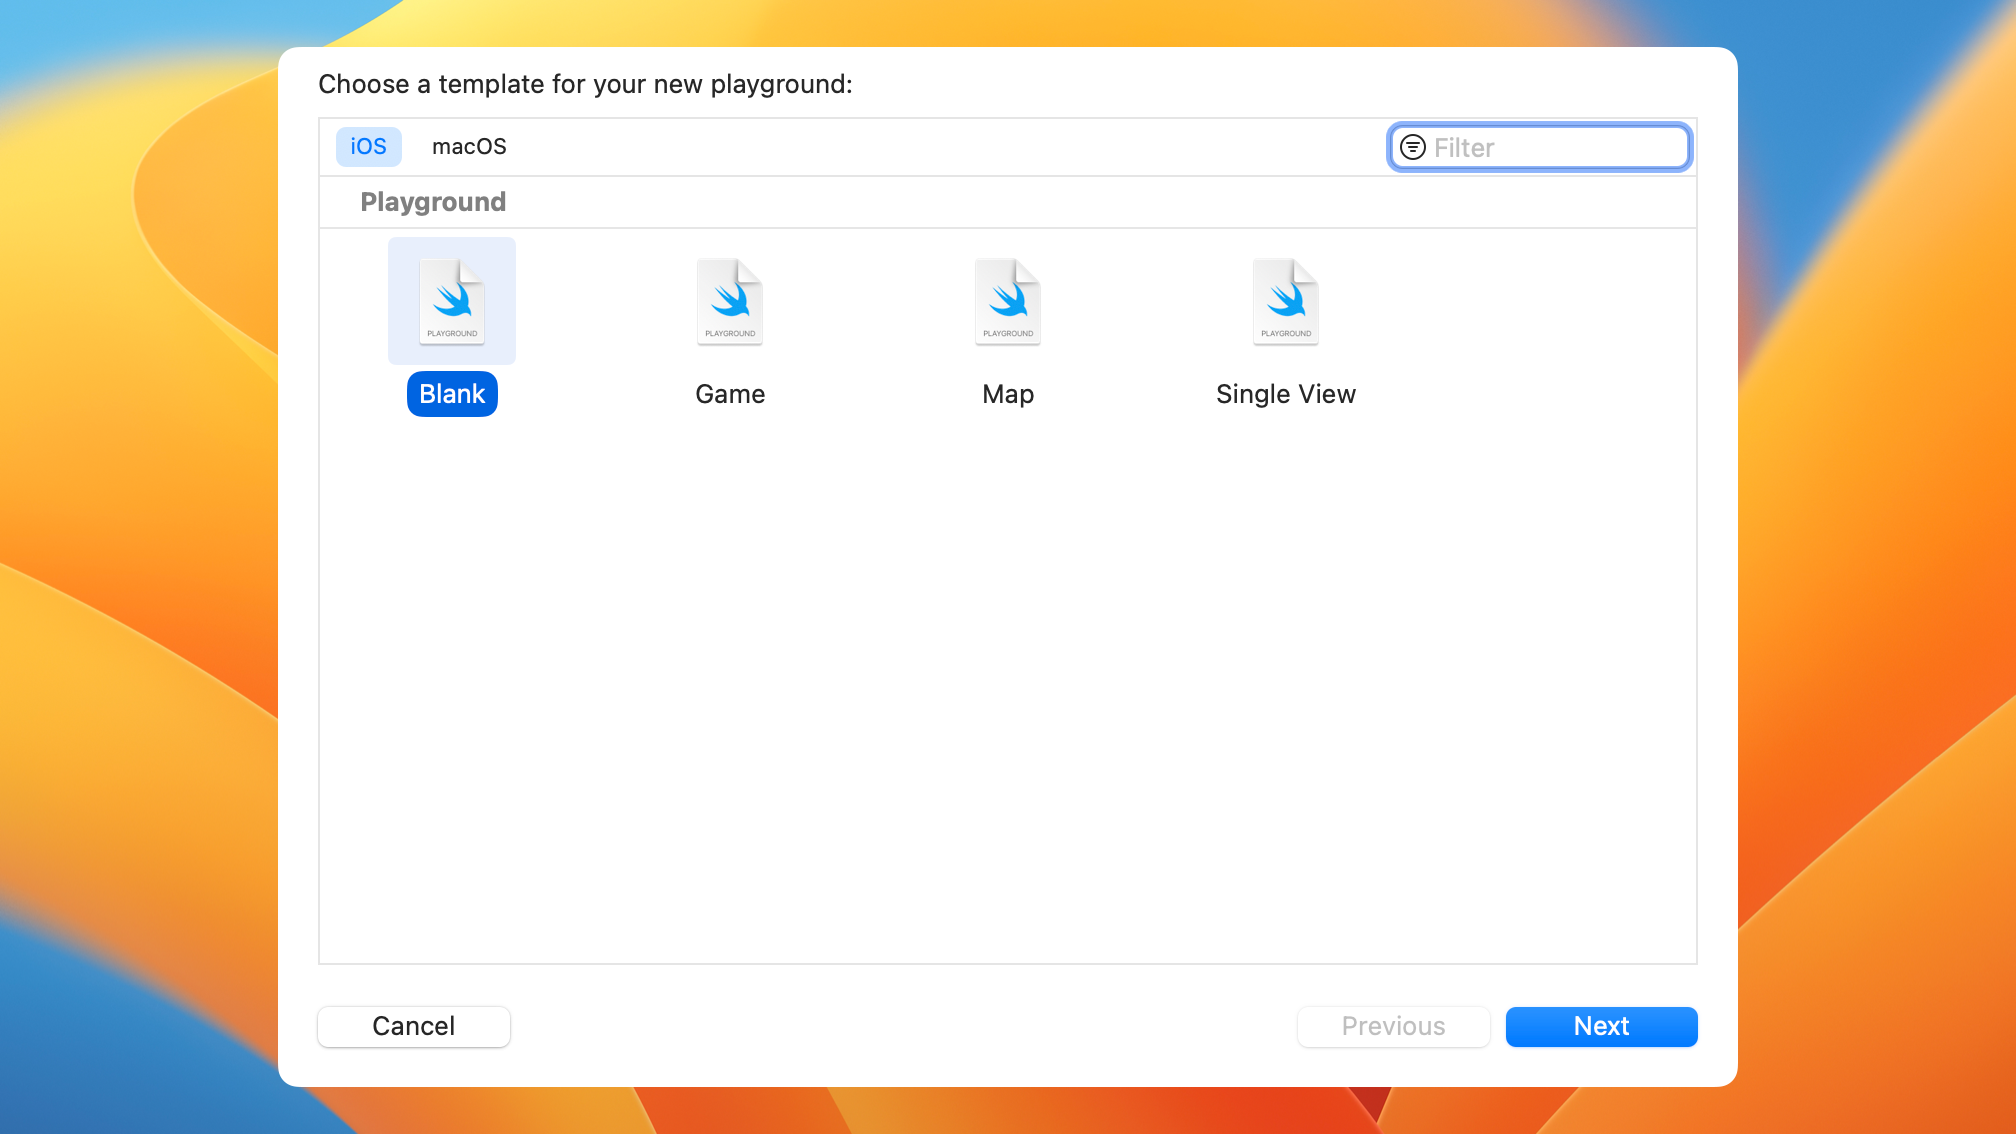
Give your Playground a name (or leave the default) and click Create.
Constants vs. variables #
In Ruby, you can set a variable over and over again.
x = 1
x = 2
Even constants can be overwritten! (With a warning.)
CONSTANT = "IMPORTANT TEXT"
CONSTANT = "SOMETHING ELSE"
# (irb):2: warning: already initialized constant CONSTANT
# (irb):1: warning: previous definition of CONSTANT was here
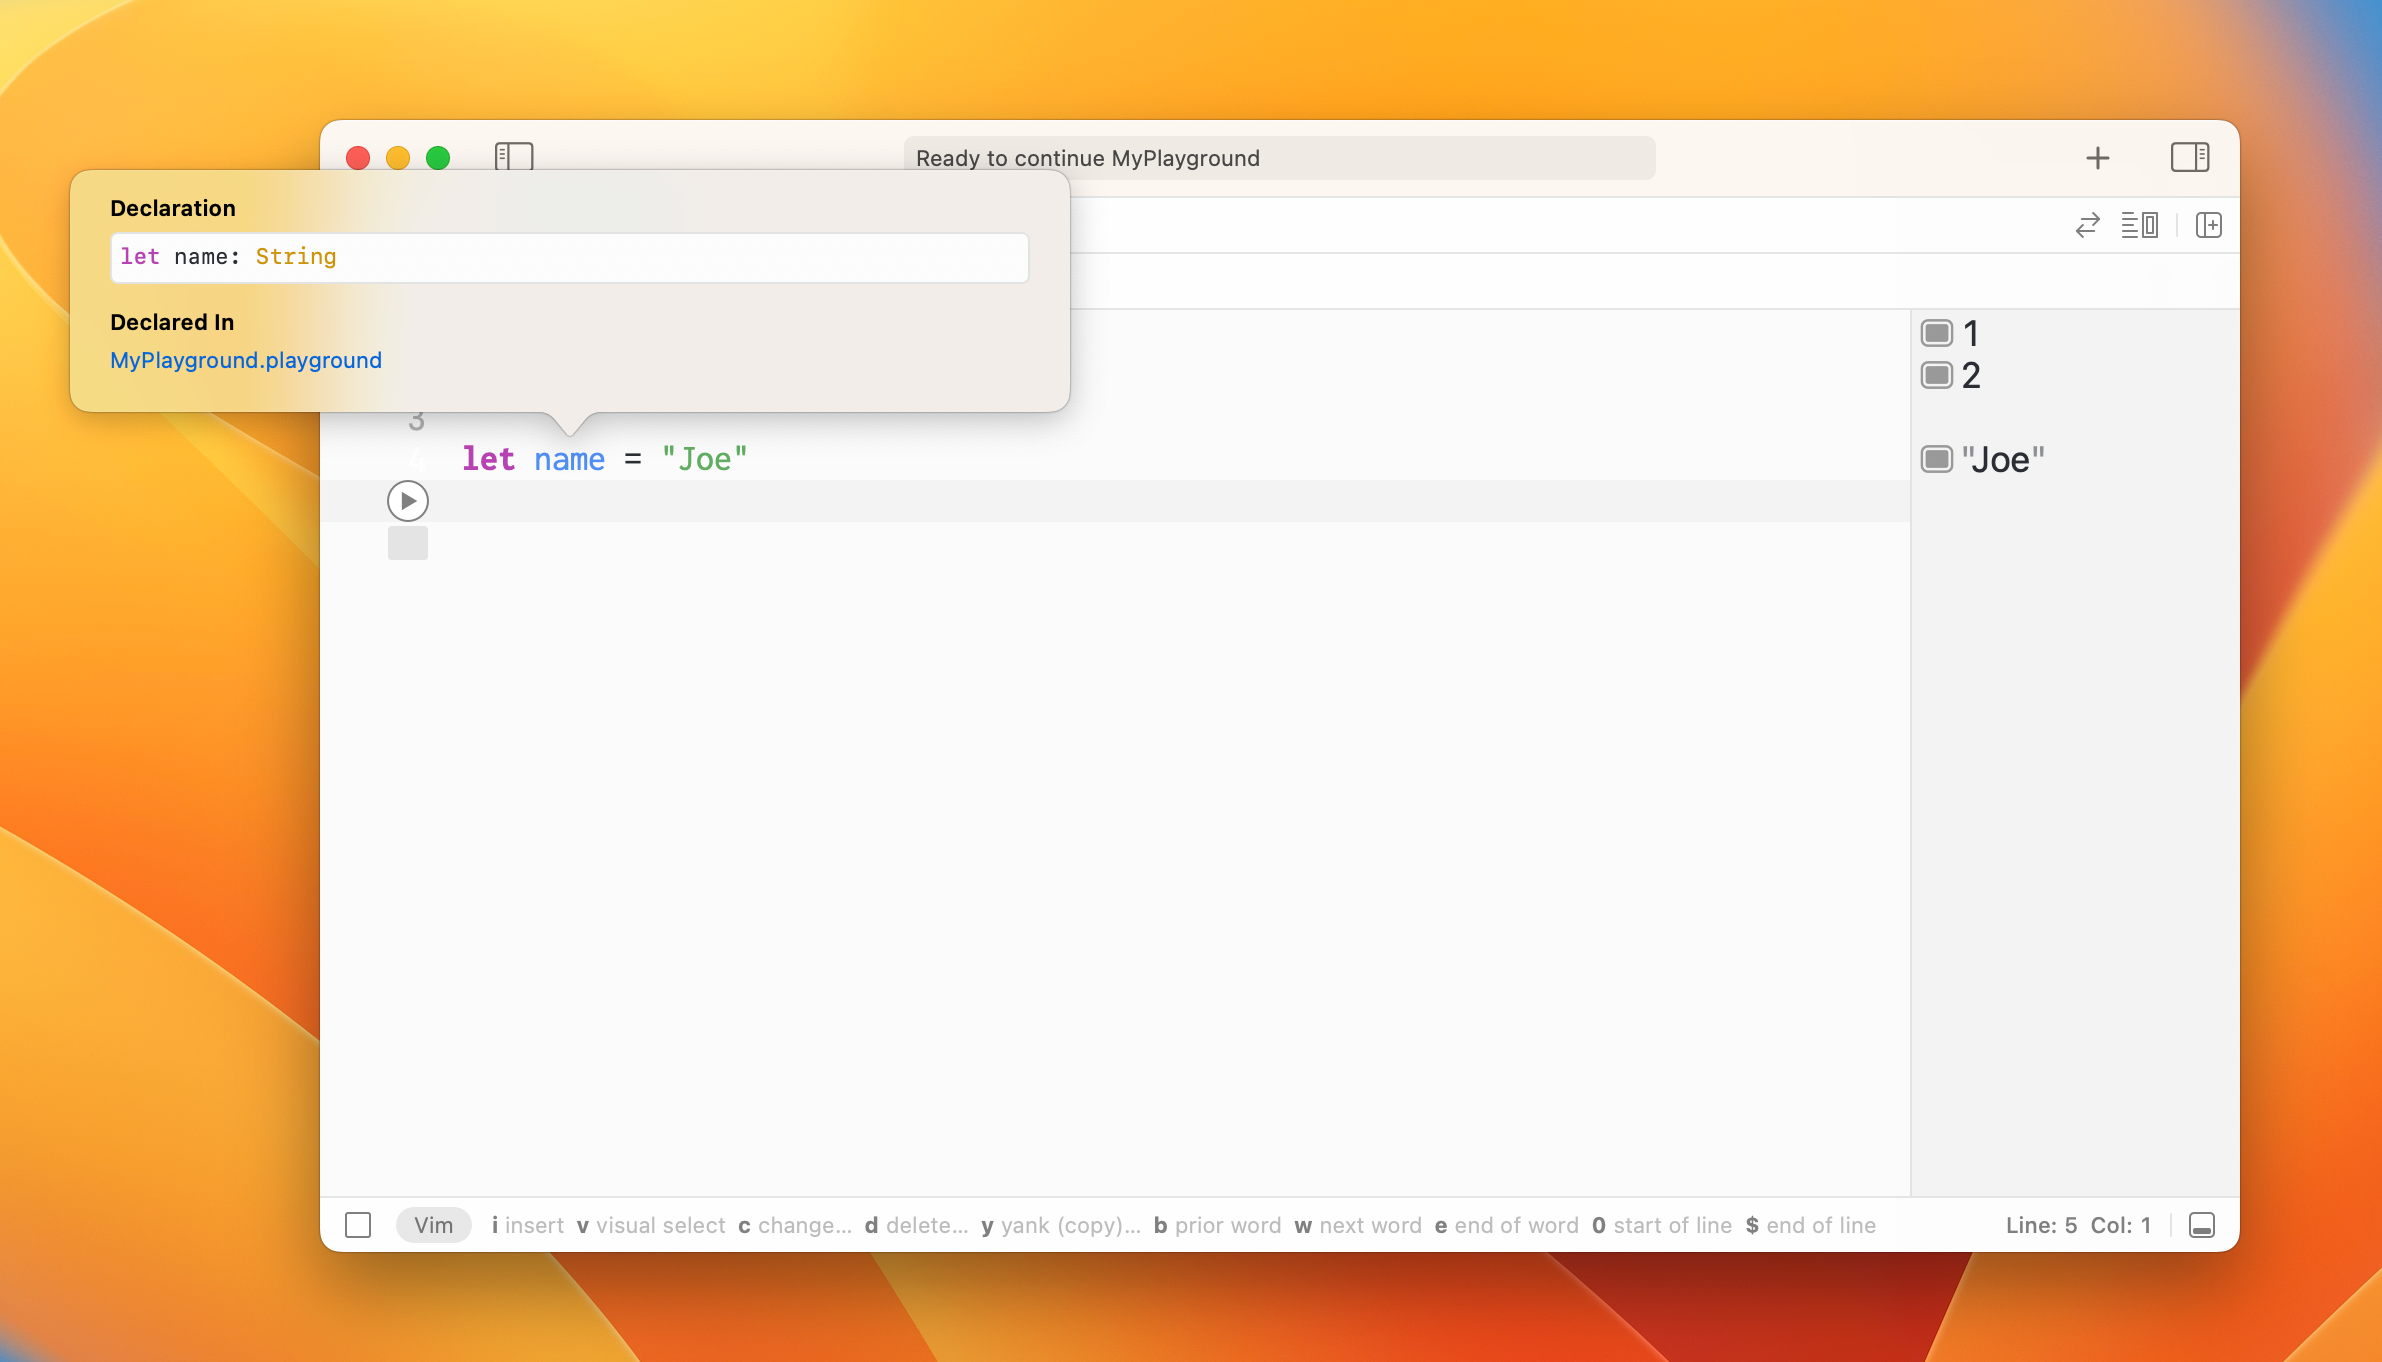
But in Swift you must decide if a variable can be modified. Declare a mutable variable with var and one that cannot be changed with let.
var x = 1
x = 2

let name = "Joe"
name = "Duke" // ERROR: Cannot assign to value: 'name' is a 'let' constant
Click the arrow at the bottom left of the editor to run the Playground, or ⌘ ⇧ ↵.

Types #
Ruby variables assume the type of whatever is assigned to them.
x = 1
x.class # => Integer

x = "Joe"
x.class # => String
Swift requires explicit, static typing. And once the type is assigned it can never be changed.
Tip: ⌥ + Click on a variable to see its type in Xcode.
var x = 1 // Int
x = "Joe" // ERROR: Cannot assign value of type 'String' to type 'Int'
Optionals #
In Ruby, any variable could potentially be nil.
x = 1
x = nil

hash = {"breakfast": "eggs", "lunch": "sandwich"}
hash["breakfast"] # => eggs
hash["snack"] # => nil
In Swift, variables must be explicitly declared as optional.
var x: Int = 1
x = nil // ERROR: 'nil' cannot be assigned to type 'Int'

// Note the question mark - this is an optional Int.
var y: Int? = 1
y = nil

let dictionary = ["breakfast": "eggs", "lunch": "sandwich"]
let breakfast = dictionary["breakfast"] // String?
let snack = dictionary["snack"] // String?
Notice how both variables are strings with a question mark? The compiler knows that these can be either a string or nil. This is an optional type.
To use optionals we need to unwrap them.
Force unwrap #
We can force unwrap an optional with a bang, !. But if a nil is force unwrapped it will crash the app.
"2x " + breakfast! // "2x eggs"
"2x " + snack! // FATAL ERROR: Unexpectedly found `nil` while unwrapping an Optional value
Optional binding #
If you’re not sure if a variable can be nil or not then optional binding is a safer choice. If the right hand side is nil then the body of the if statement won’t run, avoiding a crash.
if let breakfast = breakfast {
    "2x + " breakfast // "2x eggs"
}

if let snack = snack {
   "2x " + snack // Never run!
}
We can also use the shorthand syntax if the new variable shares the same name.
if let breakfast {
    "2x + " breakfast // "2x eggs"
}
Classes and functions #
Creating a class in Swift is very similar to Ruby. Instead of a do end block we use braces.
class Person {}

let person = Person()
By default functions don’t return anything, “void functions”. But a return type can be added.
class Person {
    // Does not return anything.
    func eat() {
        // Go eat something.
    }

    // Must return a string.
    func sayHi() -> String {
        return "Hello"
    }
}

let person = Person()
person.eat()
person.sayHi() // "Hello"
Function parameters in Swift behave like named parameters in Ruby.
func eat(food: String) {
    print("Eating \(food)... Yum!")
}

eat(food: "pizza") // "Eating pizza... Yum!"
We can omit the parameter name at the call site by declaring the parameter with an underscore.
func drink(_ beverage: String) {
    print("Drinking \(beverage)... Delicious!")
}

// Note how we omitted the parameter name.
drink("coffee") // "Drinking coffee... Delicious!"
Static vs. Dynamic typed language #
Ruby is an implicitly typed language. Or, duck-typed. If it looks like a duck, walks like a duck, and quacks like a duck, well, it’s probably a duck. So let’s treat it like one.
This means we can attempt to call any method on any object in our system. And Ruby will figure out at runtime if that instance can actually handle it.
class Dog
  def say_hi
    "Woof"
  end
end

class Cat
  def say_hi
    "Meow"
  end
end

Dog.new.say_hi # => "Woof"
Cat.new.say_hi # => "Meow"

animals = [Dog.new, Cat.new]
animals.map { animal do
  animal.say_hi # => ["Woof", "Meow"]
end
But Swift is statically typed. We can only call a method the compiler knows an instance will respond to. Otherwise we will get a build time error.
class Dog {
    func sayHi() -> String {
        return "Woof"
    }
}

class Cat {
    func sayHi() -> String {
        return "Meow"
    }
}

Dog().sayHi() // "Woof"
Cat().sayHi() // "Meow"

// Note the generic typing of the array as Any, or "anything".
let animals: [Any] = [Dog(), Cat()]
animals.map { animal in
    animal.sayHi() // ERROR: Value of type 'Any' has no member 'sayHi'
}
To get around this we need to introduce a common interface. An API that tells the compiler that both Cat and Dog can say hi. In Swift, we call this a protocol.
Protocols #
A protocol defines method signatures, only. It leaves the implementation to the class itself.
protocol Animal {
    func sayHello() -> String
}
Now we can have each animal conform to the Animal protocol.
class Dog: Animal {
    func sayHi() -> String {
        return "Woof"
    }
}

class Cat: Animal {
    func sayHi() -> String {
        return "Meow"
    }
}

// Note the new explicit type of the array.
let animals: [Animal] = [Dog(), Cat()]
animals.map { animal in
    animal.sayHi() // "Woof", "Meow"
}
Extensions #
We can make our code a bit tidier by implementing the protocol in an extension instead of directly in the class.
class Dog {}

extension Dog: Animal {
    func sayHi() -> String {
        return "Woof"
    }
}
If Dog implemented a few different protocols we can organize the relevant methods in their own areas of the codebase.
We can also add functionality to classes we don’t even own with an extension. Here we are adding a function to see if an integer is 42 or not. We don’t own Int, it’s part of the standrd Swift library!
extension Int {
    func is42() -> Bool {
        self == 42
    }
}

42.is42() // true
33.is42() // false
That wraps up my Swift crash course for Ruby developers. I’d love to hear your feedback! If you have any suggestions for other topics please send me an email.
Stay tuned for part 2, where I’ll cover iOS for Rails developers. We’ll dive into creating a new iOS project, navigating Xcode, and view controller navigation. Get notified when it’s live by signing up for my weekly newsletter below.