
App Store submission tips for Turbo Native apps
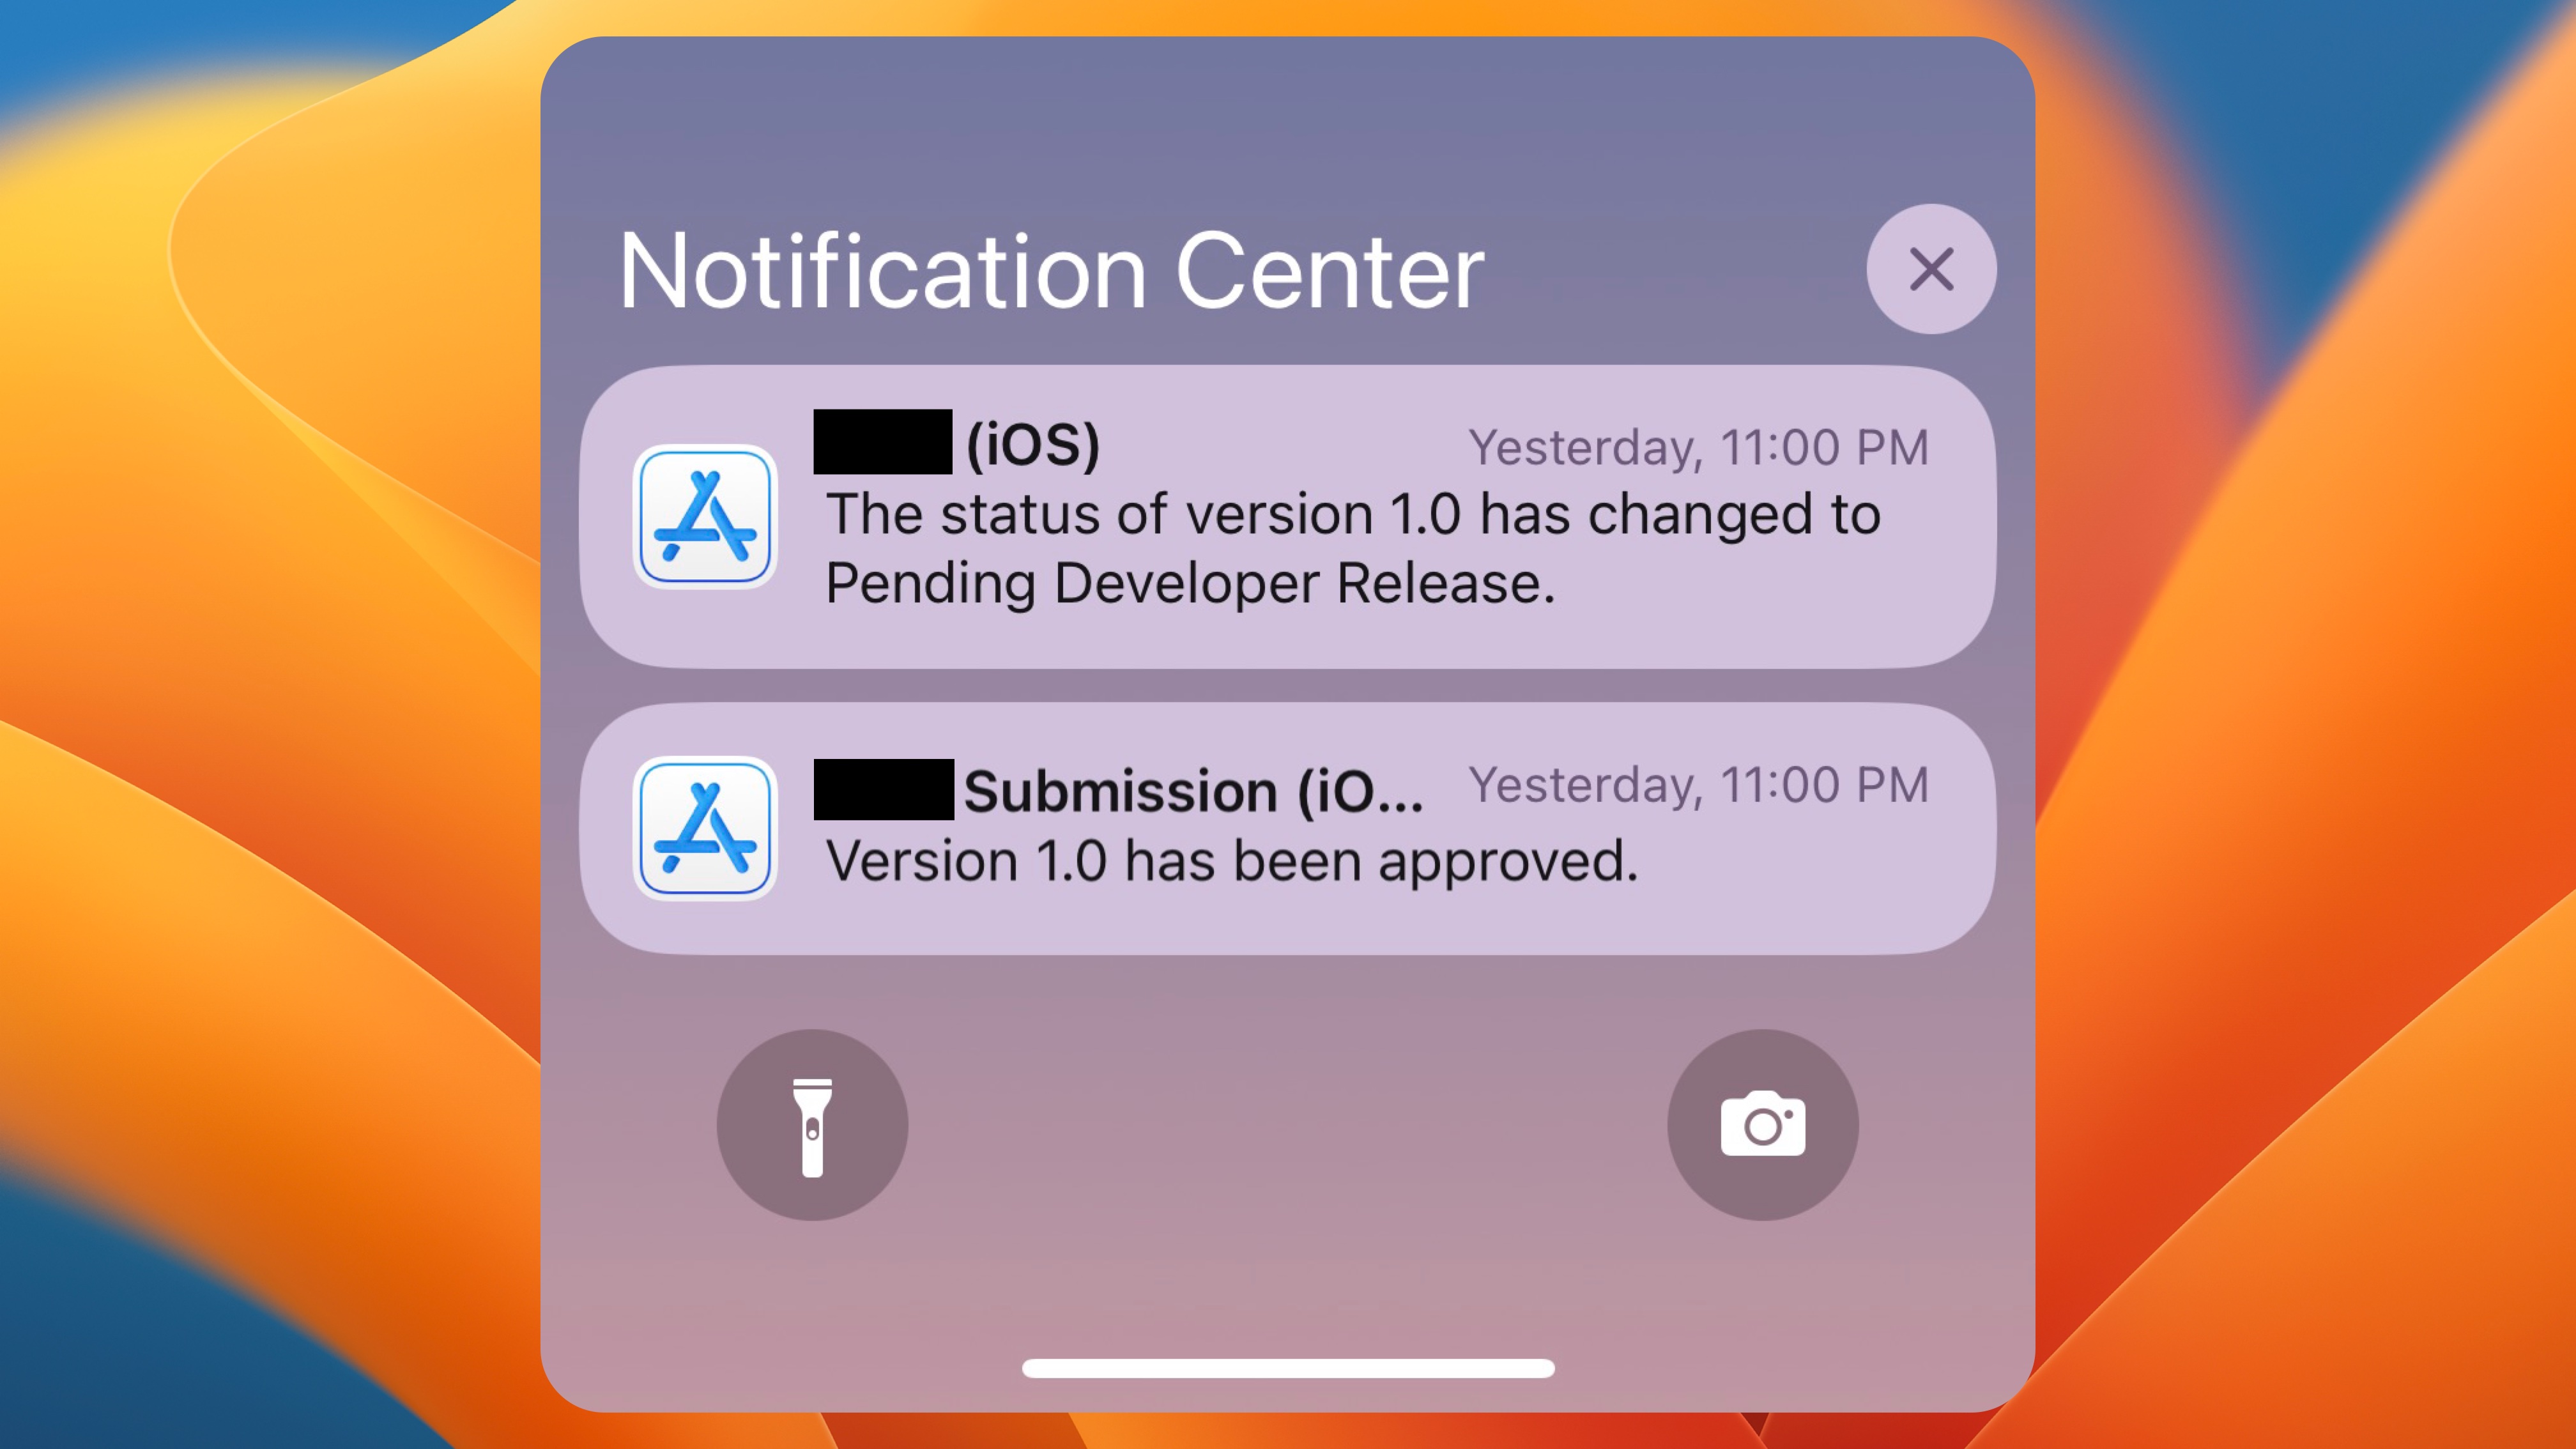
Last week, one of my client’s Turbo Native apps was approved for sale in the App Store. It took a few back-and-forths with the Apple review team, but after 3 weeks we finally made it!
The good news is that most of the issues could have been avoided with our first submission. Here are some App Store Review Guidelines to watch out for when submitting your own Turbo Native app to the App Store.
4.2 Minimum Functionality
Your app should include features, content, and UI that elevate it beyond a repackaged website…
4.2 is by far the most important guideline to consider when building a Turbo Native app. You will most likely not get accepted if you repackage your Rails app in some native chrome.
It needs something more to warrant an app. Ideally something unique to the platform, like a native feature or two.
I usually reach for a native tab bar or push notifications. These are not especially difficult to add on top of a barebones Turbo Native app. But they go a long way in making it feel way more native.
Another option is to replace your web-based hamburger menu with a native UIMenu. This is a bit more work than a tab bar, yes. But it does look really good!
2.1 - Performance - App Completeness
Submissions to App Review, including apps you make available for pre-order, should be final versions… Make sure your app has been tested on-device for bugs and stability before you submit it, and include demo account info (and turn on your back-end service!) if your app includes a login… We will reject incomplete app bundles and binaries that crash or exhibit obvious technical problems.
In short, don’t submit an app that crashes.
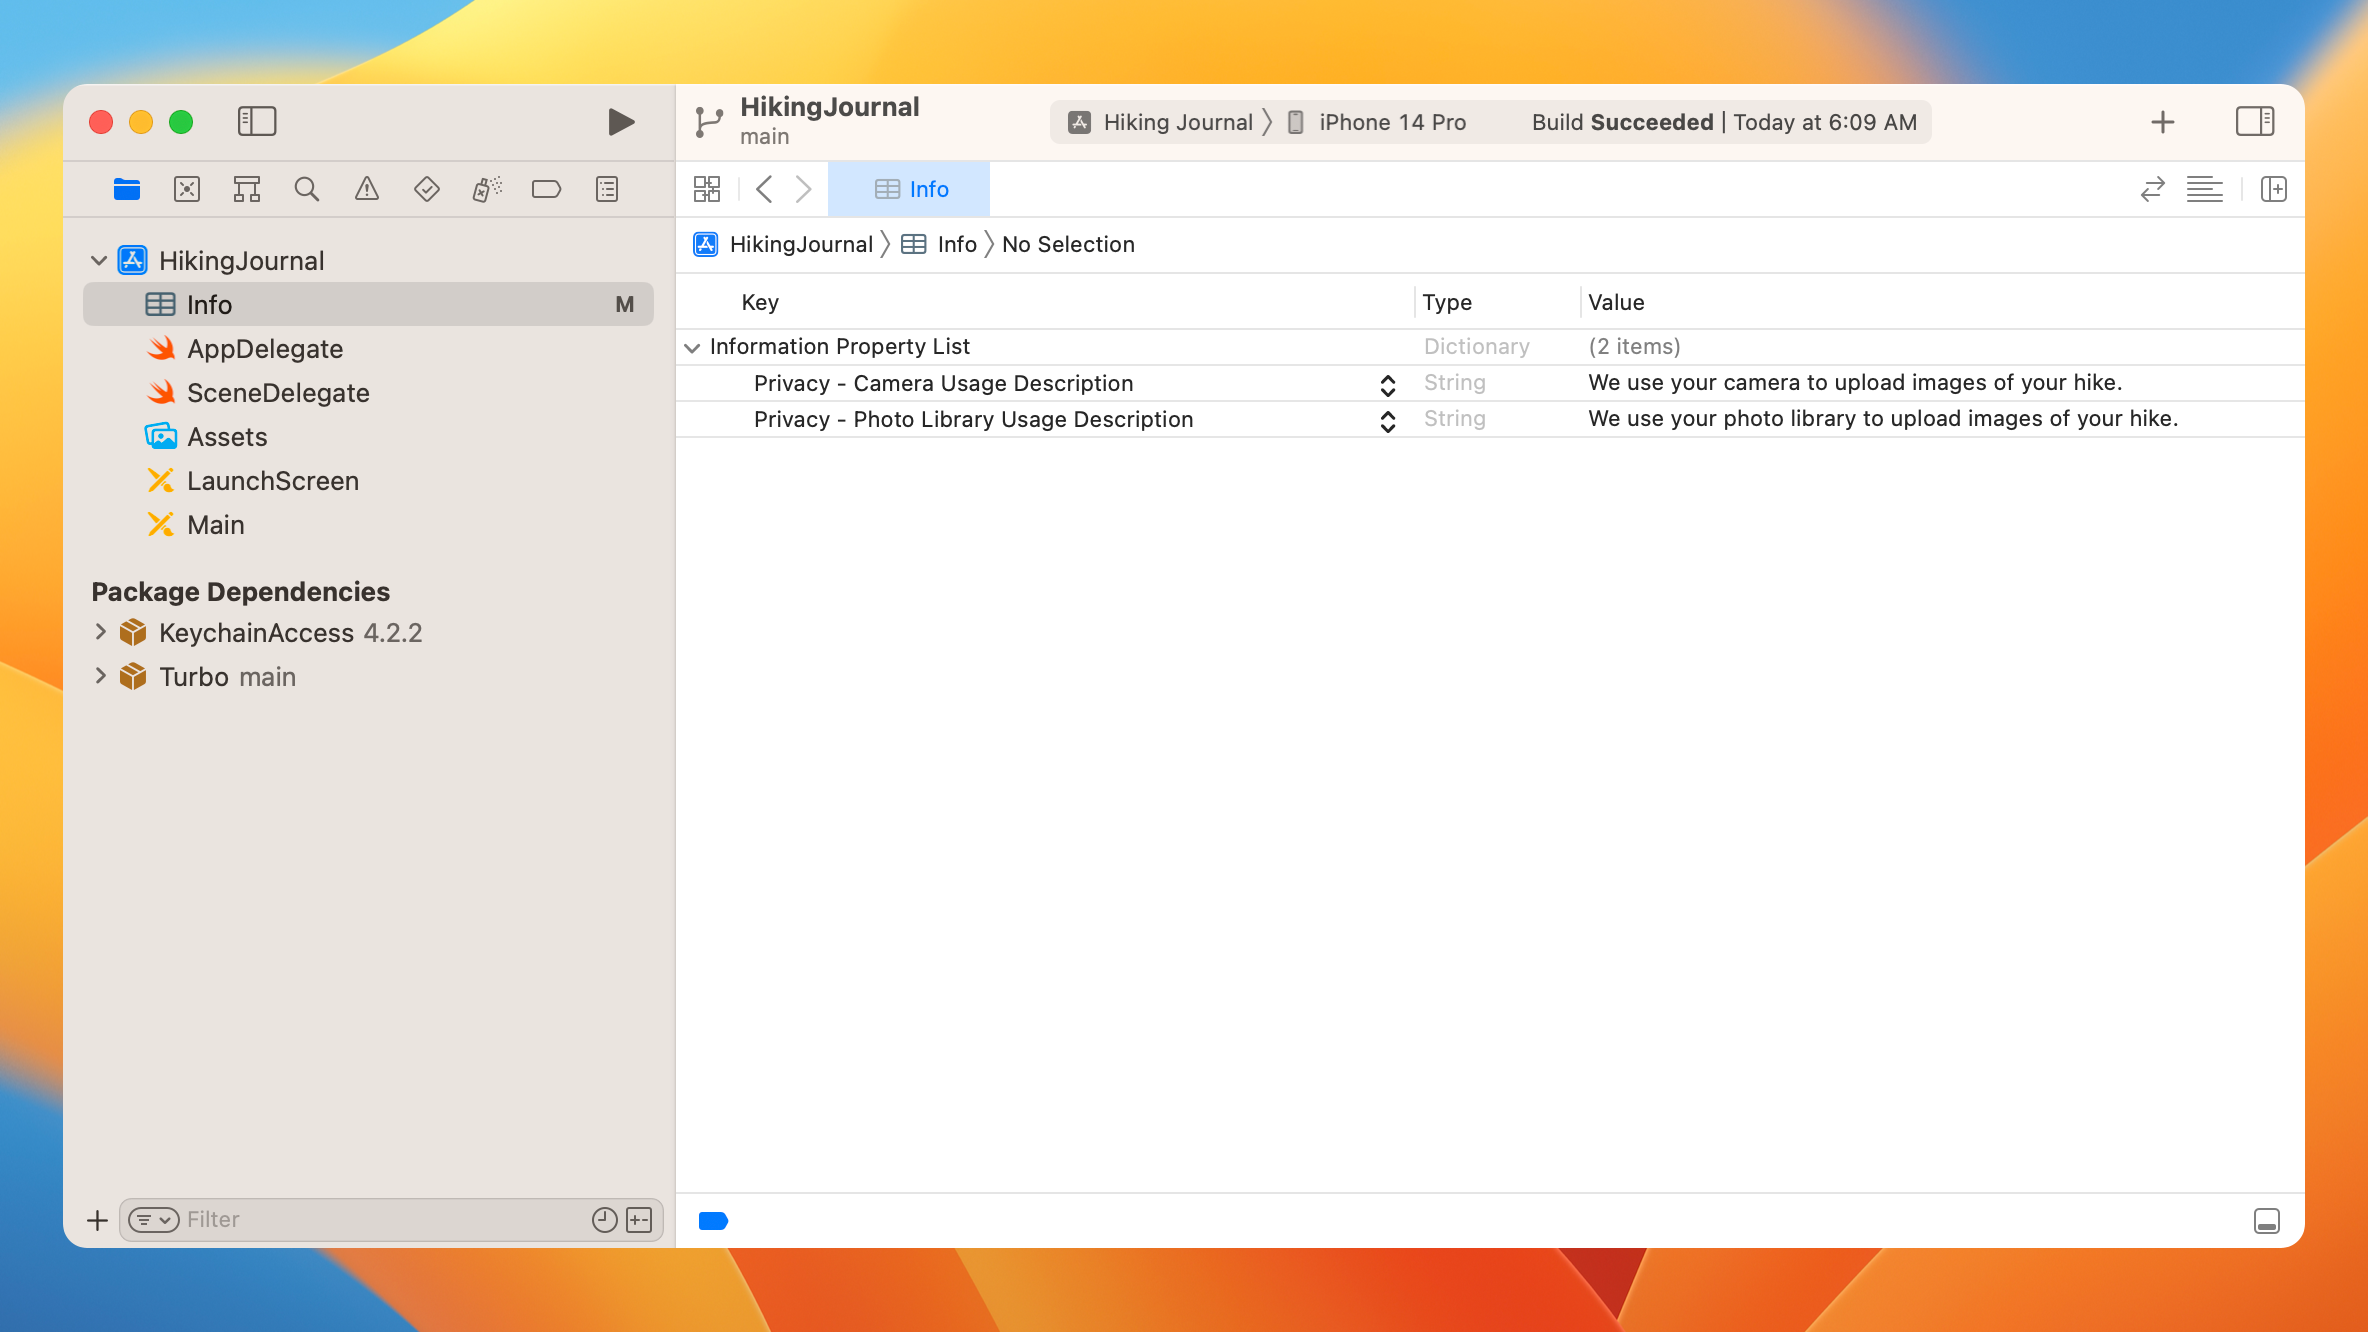
A common and easily overlooked crash occurs when accessing the camera or photo library. For example, a web form that accepts files via <input type="file">.
When accessed in the web view that powers Turbo Native, we need to ask the user for permission first. Otherwise, the app will crash. Lucky for us, it’s a two-liner!
Set NSCameraUsageDescription and NSPhotoLibraryUsageDescription to request access to the user’s camera and photo library, respectively. These can be set in the Info.plist file in your Xcode project.
Make sure to set the description to something that makes sense for your app. More information on what, and why, can be found in the docs.
Guideline 5.1.1(v) - Data Collection and Storage
If your app doesn’t include significant account-based features, let people use it without a login. If your app supports account creation, you must also offer account deletion within the app…
A rather new requirement that was added in June 2022. And one that I forget more often than I care to admit.
The guidelines include making the account deletion option easy to find in your app and offering to delete the entire account record, along with associated personal data.
For Turbo Native apps, I treat this interaction the same as when someone signs out. But instead of sending DELETE to /sessions, it goes to /users. The actual account deletion all occurs on the server side.
3.1.3(b) Multiplatform Services
Apps that operate across multiple platforms may allow users to access content, subscriptions, or features they have acquired in your app on other platforms or your web site, including consumable items in multi-platform games, provided those items are also available as in-app purchases within the app.
No one wants to give Apple 15% to 30% of their revenue. I get it. But sometimes its easier to play by the rules then try to find workarounds.
I recommend that you should add in-app purchases to your app if:
- A potential customer can pay you directly for your service and
- they can do so via a self-serve interaction.
But with all of your business logic on the server, it can be tough to coordinate permissions on the client. To help with this I reach for RevenueCat.
The RevenueCat SDK simplifies the in-app purchase flow dramatically. And it sends your server a webhook for each subscription change. The only responsibility the client app has is to initiate the purchase screen. Everything else is handled via RevenueCat and your server.
Also, please note that there are many rules and exceptions regarding in-app purchases! I recommend reading and understanding all of 3.1 Payments before deciding if an iOS app is the right fit for your business. Or, book a call and we can chat.
2.3.2
If your app includes in-app purchases, make sure your app description, screenshots, and previews clearly indicate whether any featured items, levels, subscriptions, etc. require additional purchases.
Here’s another note if you decide to add in-app purchases to your app. I recently had an app rejected because the App Store description mentioned premium features without indicating they were paid.
The fix was a quick copy change done in App Store Connect. But if possible, I’d avoid this next time by reviewing the metadata before submitting.
Paid Applications agreement
Apps with in-app purchases will also need to comply with the Paid Applications agreement. An active Apple developer account is required for access, so I won’t quote directly.
Here are a few notes I’ve forgotten and have had apps rejected for in the past:
- Include a link to the Terms of Use (EULA) in the app binary
- Include a link to the Terms of Use (EULA) in the app metadata
- Include a link to the privacy policy in the app binary
Need some extra help?
I’ve picked up these tips first hand, helping dozens of folks launch their Turbo Native apps in the App Store. But the process can be overwhelming to someone who is new to the Apple ecosystem.
If you’re thinking of launching an iOS app then get in touch. I offer everything from 1:1 advisory calls, leveling up your team, and building full apps. I’d love to help you launch your Rails app in the App Store with Turbo Native!