
UI Testing cheat sheet and examples
Shortly after Apple’s “Hey Siri” event the Xcode 7 GM was released to developers. Let’s put the betas behind us and take a look at some real world UI Testing examples.
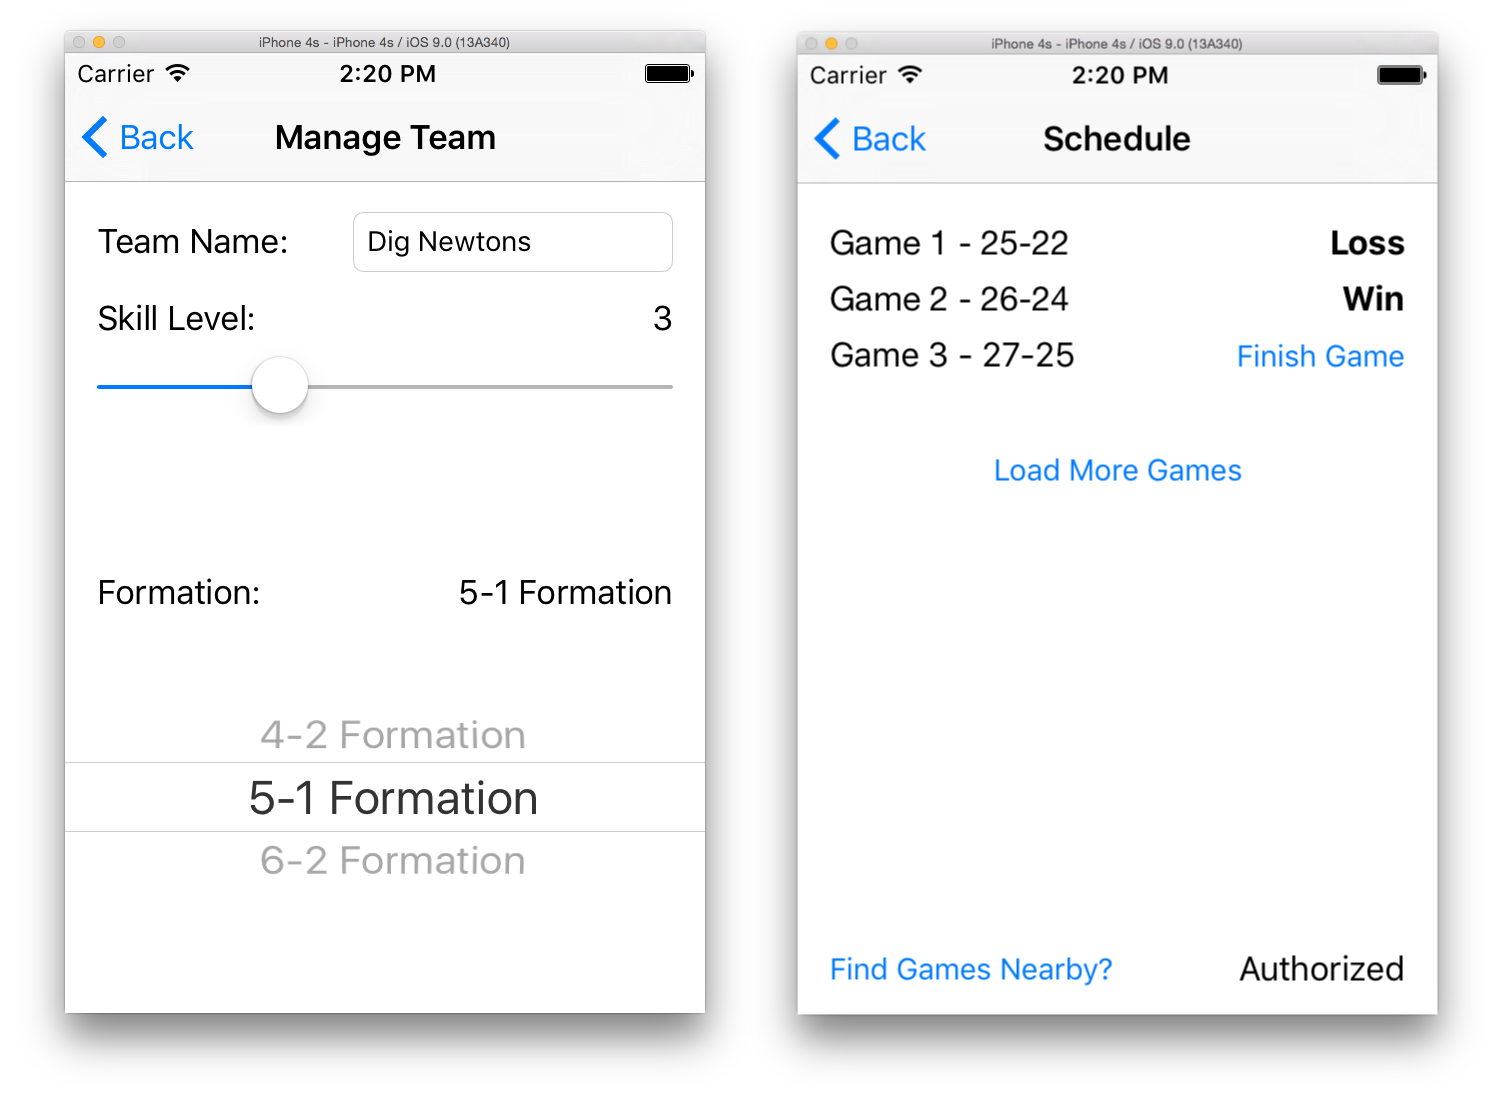
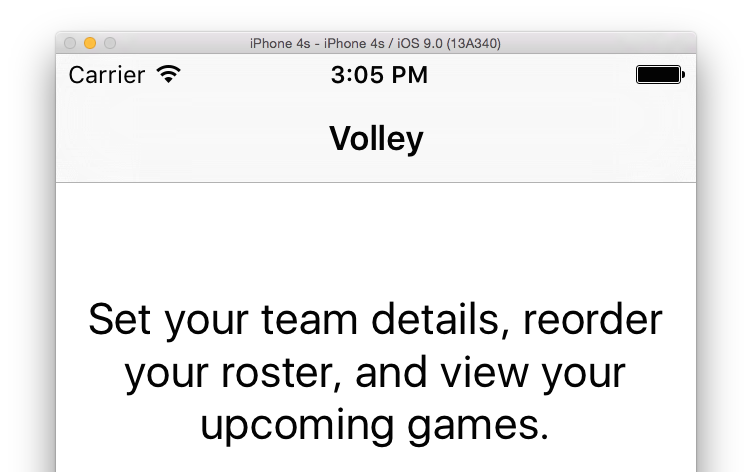
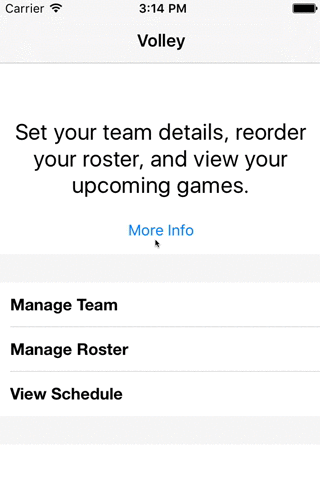
The examples all use a test host that helps you manage your volleyball team. The app, Volley, lets the user manage the team roster, adjust the formation, and view game results. Feel free to take a look at the source code before continuing along to familiarize yourself with how it works.
Why not use recording? #
You can certainly use the recording feature of UI Testing on its own. Recording makes sense when adding regression tests to an existing codebase. But you’ll miss out on the perks of writing your own tests. However, there are three reasons why recording isn’t always the best idea.
- With test-driven development you write your tests first, so you won’t have an app to record!
- Recording doesn’t always work. Recording interaction with some elements, such as web views, never works, and
UISlidermanipulation is finicky at best. - The most important reason to learn UI Testing by hand is to, well, learn it yourself! At some point you will need to read the code generated by Xcode and debug it. If you can’t figure out what is going on you are going to have a hard time deciphering where something went wrong. Also, if you are using any custom controls you will need to write the tests yourself.
Basic functionality #
These code snippets assume you are familiar with the basics of UI Testing. If you are just getting started, or would like a refresher, I suggest reading an overview of UI Testing in Xcode.
The examples also assume that your app is launched and you hold a reference to it, app. You can do this in your test class’ setUpWithFailure() method to ensure the app launches clean for every test.
class UITests: XCTestCase {
    let app = XCUIApplication()

    override func setUpWithError() throws {
        super.setUp()

        continueAfterFailure = false
        app.launch()
    }
}
How to assert an element exists #
Let’s start off simple. The first thing you will do when validating your app with UI Testing is asserting if an element exists. This is easily done by querying for an element and asking if it exists.
Using Volley’s home screen we can assert that the app’s name exists like so. Note the wrapping of the call in an XCTest assertion. This ensures that the test would fail if the label were not to exist.
XCTAssert(app.staticTexts["Volley"].exists)
How to wait for an element to appear #
Viewing our schedule in Volley shows us our last couple of game results. Alright, 2-1! Not a bad start to the season. But when’s our next game?
Tapping the Load More Games button simulates fetching data from a server. After two seconds pass, our fourth game comes back.
let nextGameLabel = self.app.staticTexts["Game 4 - Tomorrow"]
app.buttons["Load More Games"].tap()
XCTAssert(nextGameLabel.waitForExistence(timeout: 5))
If five seconds pass before the expectation is met then the test will fail.
How to print the accessibility hierarchy #
Printing the accessibility hierarchy is a good way to “see what the framework sees.” You can use this and the Accessibility Inspector to debug querying and selecting elements
print(app.debugDescription)
Interacting with system controls #
Beyond validating and verifying basic conditions, you will want to interact with your app. XCUIElement exposes a few crucial functions to help us tap around the interface. These method use a XCUIElementQuery to find the element by its accessibility label or identifier.
How to tap a button #
app.buttons["More Info"].tap()
How to type text into a text field #
Typing into a text field requires that the target has focus. Simply tapping on it will ensure the text field is the first responder.
let textField = app.textFields["Team Name"]
textField.tap()
textField.typeText("Dig Newtons")
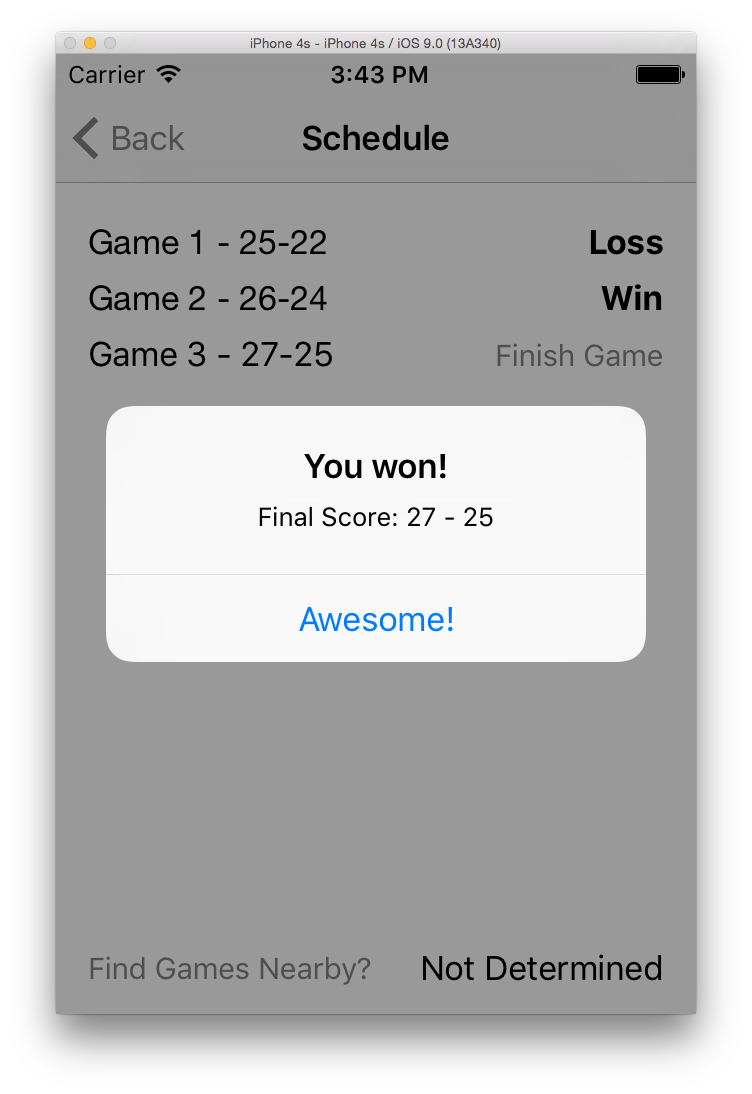
How to dismiss an alert #
First find the alert by querying for its title. You can then reference its buttons by chaining on the selector and tapping which one you want.
app.buttons["Finish Game"].tap()
app.alerts["You won!"].buttons["Awesome!"].tap()
You can try this in Volley by going to the Schedule screen and tapping on the “Finish Game” button.
How to interact with a system alert #
Ah, system alerts, the bane of all iOS testers’ existence. Almost every other framework I’ve worked with has had issues with system alerts, whether it’s location services, push notifications, or access to your photos.
With UI Testing we can finally reliably interact with these pesky dialogs. There are, however, two small gotchas.
First, set up a “UI Interuption Handler” before presenting the alert. This is our way of telling the framework how to handle an alert when it appears.
Second, after presenting the alert you must interact with the interface. Simply tapping the app works just fine, but is required.
addUIInterruptionMonitor(withDescription: "Location Dialog") { (alert) -> Bool in
    alert.buttons["Allow"].tap()
    return true
}

app.buttons["Find Games Nearby?"].tap()
app.tap() // need to interact with the app for the handler to fire
XCTAssert(app.staticTexts["Authorized"].exists)
How to slide a slider #
When adjusting a UISlider with UI Testing you don’t pass in the value you want to set. Instead, you normalize the value on a scale from 0 to 1. For example, the slider in Volley has a range of 0 to 10. To slide the scrubber to 7 we pass in 0.7, or, how I like to think of it, 70%.
app.sliders.element.adjust(toNormalizedSliderPosition: 0.7)
How to select an item from a picker #
XCUIElement has a special method for interacting with UIPickerViews. For a picker with only one wheel, we can access it via element() then just adjust to our specified value.
Picker with one wheel #
app.pickerWheels.element.adjust(toPickerWheelValue: "6-2 Formation")
Picker with multiple Wheels #
If the picker is more complex with multiple wheels we have a little set up to do. We need a way to identify the different wheels to the framework. Conforming to the UIPickerViewAccessibilityDelegate provides the right interface to set accessibility text on each picker.
extension ManageTeamViewController: UIPickerViewAccessibilityDelegate {
    func pickerView(_ pickerView: UIPickerView, accessibilityHintForComponent component: Int) -> String? {
        return component == 0 ? "Attackers Formation" : "Setters Formation"
    }
}
This then sets the first wheel’s accessibility title to “Attackers Formation, 4 attackers.” Notice how the selected value sneaks in? To actually select the element we will need to match it with a BEGINSWITH predicate.
let attackers = NSPredicate(format: "label BEGINSWITH 'Attackers Formation'")
let attackersPicker = app.pickerWheels.element(matching: attackers)
attackersPicker.adjust(toPickerWheelValue: "5 attackers")

let setters = NSPredicate(format: "label BEGINSWITH 'Setters Formation'")
let settersPicker = app.pickerWheels.element(matching: setters)
settersPicker.adjust(toPickerWheelValue: "1 setter")
How to tap links in a web view #
There’s nothing too exciting going on here, which leads to a clean API. The tap() method can be used with both UIWebView and WKWebView.
app.links["Volleyball"].tap()
Complex interactions #
How to assert a view is on the screen #
One weird behavior of exists() is that it returns true even if the element is off the screen. You have to jump through some hoops to make sure the element is actually visible to the user.
We can test this by asserting that the element’s frame is contained in the window’s frame with CGRectContainsRect().
let window = app.windows.element(boundBy: 0)
let element = app.buttons["On"]
XCTAssert(window.frame.contains(element.frame))
How to reorder table cells #
Open up the Accessibility Inspector and hover over the Manage Roster screen. The little reordering icons automatically get their own accessibility titles based on the cell that they are contained in. Here the cell’s label is “Adrienne,” so the icon’s identifier becomes “Reorder Adrienne.”
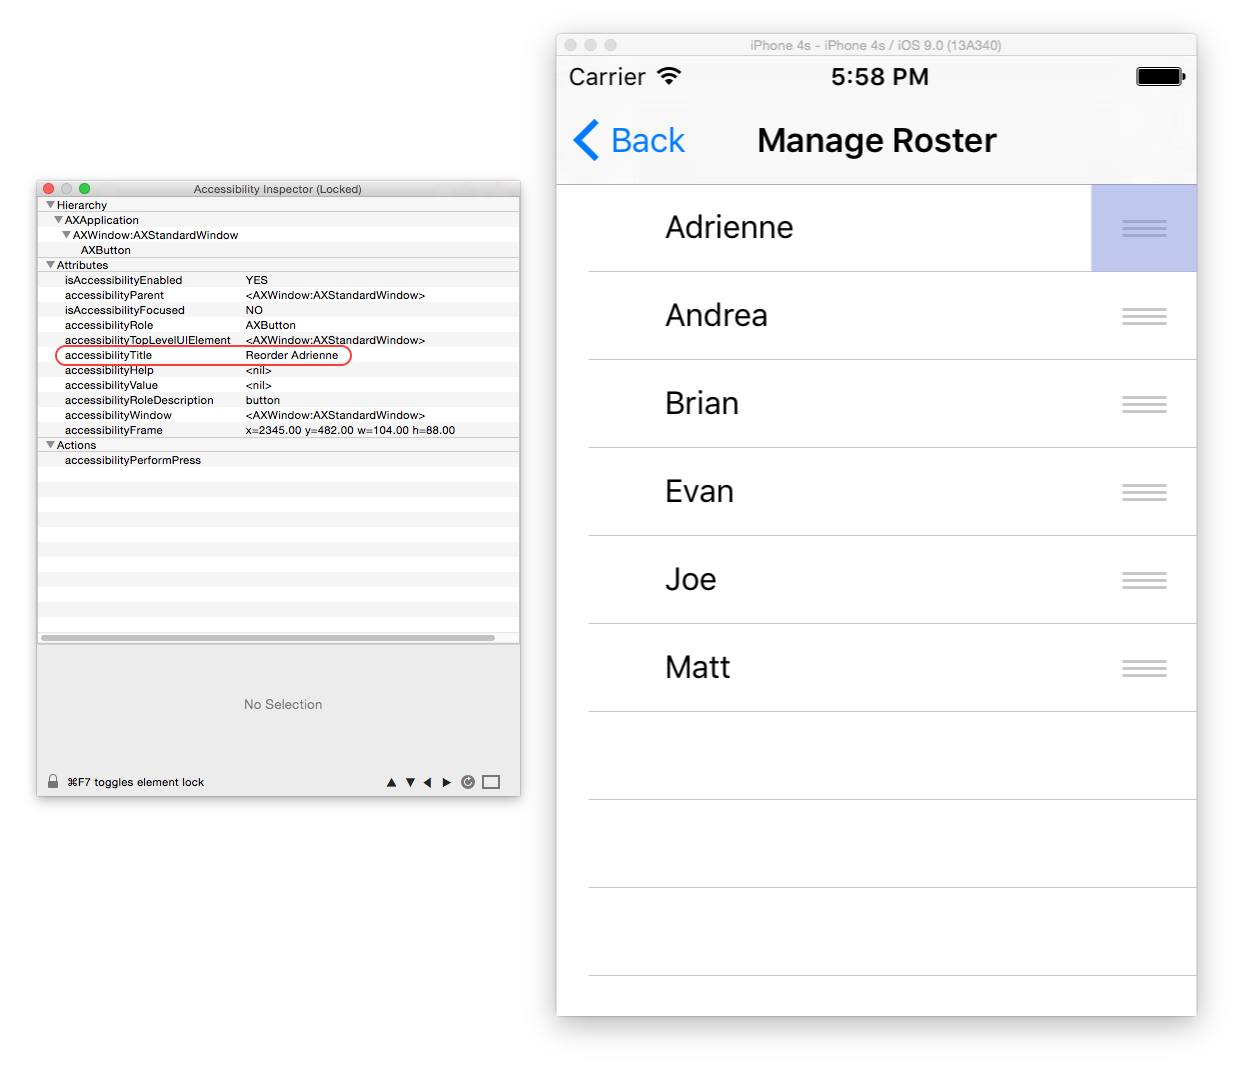
We can now use these to drag cells up and down.
let joeButton = app.buttons["Reorder Joe"]
let brianButton = app.buttons["Reorder Brian"]
joeButton.press(forDuration: 0.5, thenDragTo: brianButton)
How to “pull to refresh” #
To replicate this gesture we need to drop into the XCUICoordinate API. You can use these objects to interact with specific points on the screen, not necessarily tied to any particular element. This becomes very useful when we want to drag an element to a specific location.
First, grab a reference to the first cell in your table. Then create a coordinate with zero offset, CGVectorMake(0, 0). This will normalize a point right on top of the first cell.
Using this point we can create an imaginary coordinate farther down the screen. I’ve found that a dy of six is the smallest amount needed to trigger the pull-to-refresh gesture.
We can then execute the gesture by grabbing the first coordinate and dragging it to the second one.
let firstCell = app.staticTexts["Adrienne"]
let start = firstCell.coordinate(withNormalizedOffset: CGVector(dx: 0, dy: 0))
let finish = firstCell.coordinate(withNormalizedOffset: CGVector(dx: 0, dy: 6))
start.press(forDuration: 0, thenDragTo: finish)
What else? #
Looking for a specific technique or notice something is missing? Leave a comment below or reach out to me on Twitter. I’m more than happy to add it to the post!